
What this helps you do
Create an Event with its date, time, location, and public details, then publish it as public, unlisted, or private.
Before you begin
- A full Admin can create, edit, and publish Events.
- A Limited Admin needs Events View, Create, and Edit permissions to complete the full workflow. View opens Events, Create adds the private draft, and Edit changes its status and visibility for publishing.
- A Team Leader can create a private draft Event, but cannot edit or publish it. Team Leaders cannot create a public Event.
- Event times use the timezone selected for your church under Church Settings. Enter the date and time in that church timezone; the admin and public Event pages display them in the same timezone.
- To use a saved location, an Admin must first add an active physical or online location under Church Settings. You can also choose No location.
Creating and publishing an Event does not notify people. Registration is a separate option and is not required to publish an Event.
Steps
Create the Event draft
- In the admin navigation, select Events.
- Select Add Event.
- Enter the Name.
- Add the public-facing details you need:
- Description — a short summary shown on Event listings.
- About — detailed, formatted information shown on the Event page.
- Location — an active saved location, or No location.
- Enter Start Date & Time and End Date & Time in your church’s timezone.
- Leave Enable registration off when the Event does not need signups. Registration settings and confirmations are a separate workflow.
- Select Create Event.
Engage Spot opens the Event details page. A newly created Event has Draft status and Private visibility, so it is not yet available on the public church site.
Publish the Event
-
On the Event details page, select Edit.
-
Review the name, description, About content, location, and date and time.
-
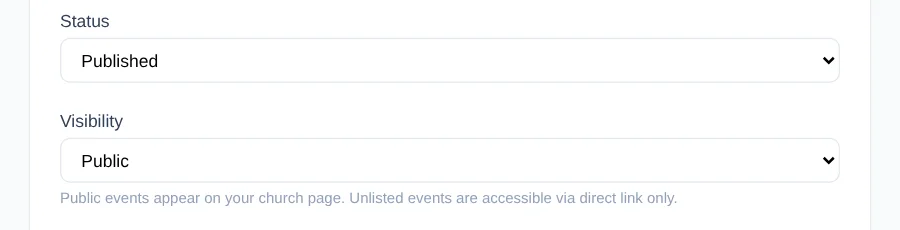
Under Status, choose Published.
-
Under Visibility, choose who can find the Event:
- Public — appears on the church’s public Events page and opens through its direct link.
- Unlisted — does not appear on the public Events page but opens through its direct link.
- Private — does not appear publicly and its direct public link does not open.
-
Select Update Event.
Engage Spot returns to the Event details page. A published public or unlisted Event shows View page, which opens the public Event page in a new tab. A private Event does not show that action.
Edit the Event later
- In Events, select the Event.
- Select Edit.
- Update the details, Status, or Visibility.
- Select Update Event.
Changing a published Event to Draft, Cancelled, or Trashed removes it from public Event access. Changing only its visibility controls whether it is listed, direct-link only, or private.
What happens next
A published public Event appears among upcoming Events until its end time passes. A published unlisted Event remains available only to people with its direct link. A private Event stays available to admins but not public visitors.
The Event details page displays its date, time, duration, location, status, and visibility. Future edits update the public page immediately when the Event remains published and publicly accessible.
Troubleshooting
Engage Spot asks you to fix missing details
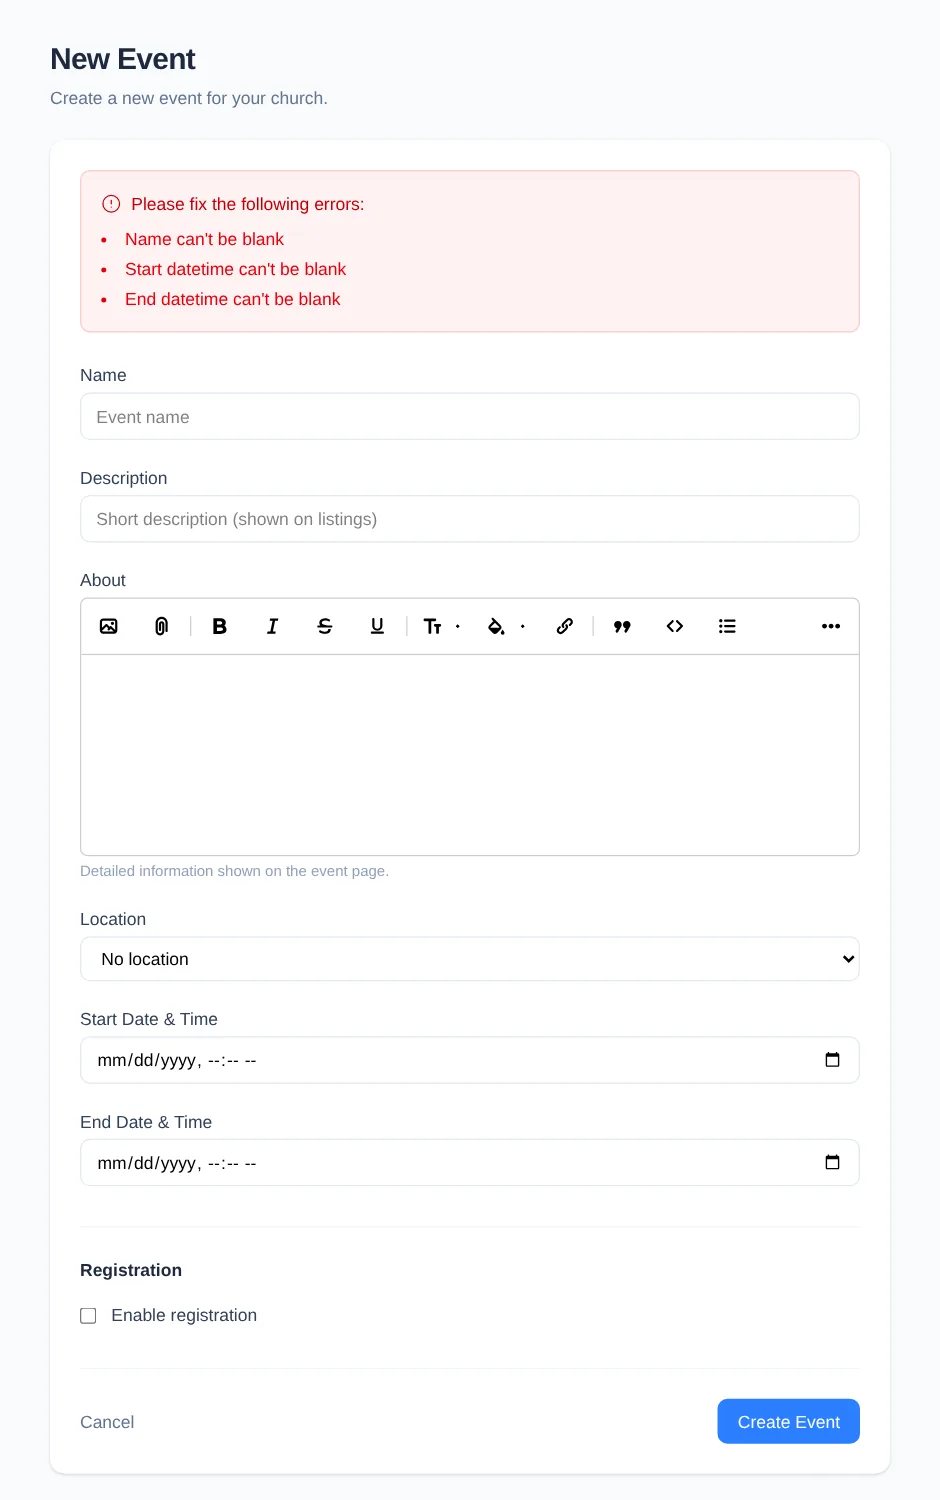
Name, Start Date & Time, and End Date & Time are required. If you submit them empty, the form shows Name can’t be blank, Start datetime can’t be blank, and End datetime can’t be blank. Complete the missing fields, then select Create Event again.
The location you need is not listed
Only active saved locations appear. Ask an Admin to add or restore the location under Church Settings, or choose No location and publish without one.
The Event does not appear on the public Events page
Confirm that Status is Published, Visibility is Public, and the Event has not ended. An Unlisted Event opens only through its direct link. A Private Event does not open publicly, even with a direct link.
Also ask a full Admin to confirm that the church’s public Events page is enabled under Church Settings.
Edit is unavailable
A Limited Admin needs Events Edit permission. Team Leaders cannot edit or publish Events; ask an Admin or a Limited Admin with the required permission to finish publishing the draft.